
Understand how the Financial Planning Software works
From simple goals-based assessments to advanced estate planning and retirement income scenarios, a subscription to our Comprehensive Financial Planning Software enables you to best serve any client who walks through your door by taking your Planning Meetings to the next level.
Access the Financial Planning software through the Optimize Portal:
- Navigate to Systems & Technology > Financial Planning
- Click Financial Planning Login
- Enter your credentials and click Login

Once logged in, you will be directed to the home screen with a list of Financial Plans that you have created. If this is the first time you are signing in, the list will be empty.

On the left hand side, a navigation pane will present you with a few options:
- Sessions: shows you a list of all your Financial Plans listed by last modified date.
- Clients: provides a list of all the clients you have prepared Financial Plans for and sorts them by last name.
Create a Financial Plan
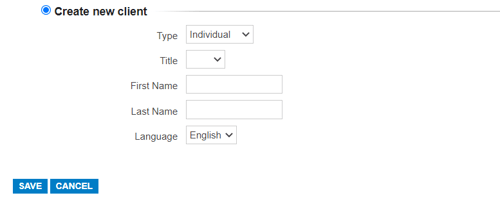
- To create a new Financial Plan, click Create New...
- Input a session name - we recommend the following format:
- Client Last Name, Client First Name
- Next, fill in the remaining fields to create a session and click Save.
- Once you're in the session, click on Client Information and then Client from the navigation menu.

- Proceed to enter the remaining personal information for the Client such as Gender, DOB and Permanent Address.
Tip: If you'd like to create a Financial Plan for a household, click the following icon and enter the details for the spouse.

Now you're ready to start entering financial data for your client:
- Click Net Worth in the navigation menu and populate the respective details.
- If the client is making monthly contributions to their investment accounts, you can also enter the monthly amount next to the investment account associated with the contributions.
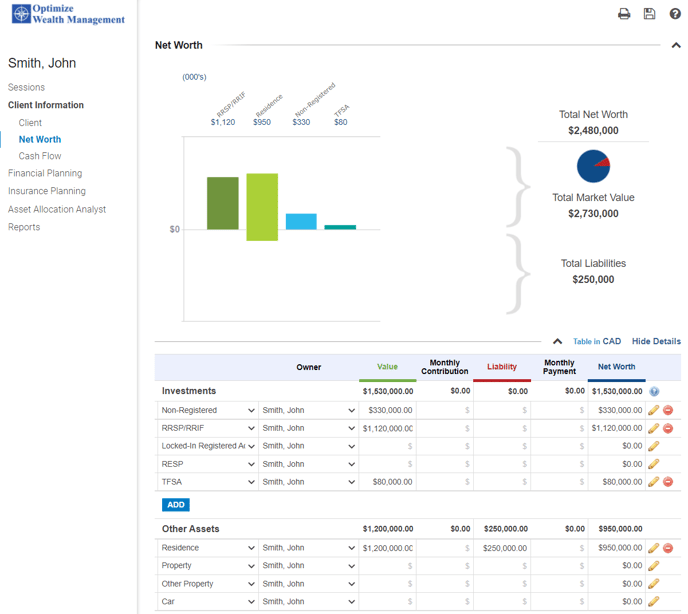
- If you would like to rename an investment account or change the currency, simply click the pencil icon on the very right and a details window will open:

- Now that the client's financial assets have been populated, the next step is completing the Client's Cash Flow.
- Click Cash Flow in the navigation menu.

- By default, you will see that a few income sources will be automatically populated:
- Old Age Security
- CPP
- Gross Employment Income
- You can amend or delete any of these if they are not applicable to your client by clicking the red (-) icon.
- You can also add additional sources of income by clicking Add and selecting from the drop down menu.
- If an income source such as a defined benefit pension plan is indexed to inflation, click the pencil icon and stipulate the indexation rate.

- Here, we've added Net Rental Income inflow of $22,000/year starting today until Retirement

- You can also modify the age at which the income starts or ends by clicking the dropdown and selecting one of the options - alternatively, you can type in a specified age as well as per below:

- If a client has not yet retired, the system will automatically calculate the maximum for CPP and OAS based on the age they are anticipating collecting the income and will assume that the client is entitled to the maximum.
- If you have a CPP statement from the client indicating otherwise, simply modify the amount that the client is entitled to.
- If you would like the system to auto-calculate the benefit, click the calculator and select the slider to the right:

- If the client is already retired and collecting CPP or OAS, disable the auto-calculate feature and input the dollar amount they are receiving:

- Proceed to enter any contributions the client is making to their investment accounts. Contributions to investment accounts are considered "Outflows" to the client's cash flow and so, ensure that you have entered the amount in the correct column.

- Once completed, navigate to Retirement in the navigation menu under Financial Planning.
- The Assumptions tab allows you to modify:
- Inflation Rate
- Retirement Age
- Life Expectancy
- Sources of income used throughout the projection.
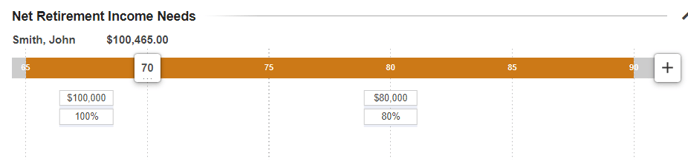
- The Needs tab enables you to specify the client's income need throughout retirement on an after-tax basis. You can also have multiple income needs throughout retirement (i.e., increased income need over the next 10 years for travel).
- In order to create multiple income needs, click the plus (+) sign and designate the income need amounts.
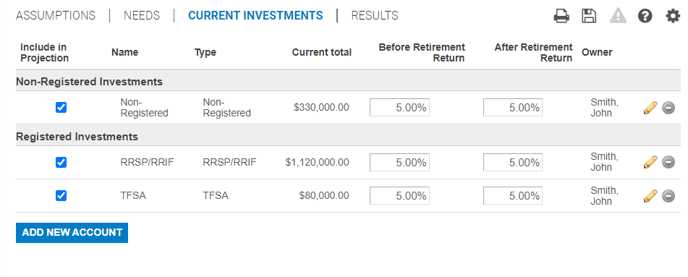
- The Current Investments tab is where you input the Rate of Return used for the projection but also gives you the ability to include/exclude any of the client's investment accounts from the Net Worth page.
- A common type of investment account excluded from projections but included on Net Worth are RESP accounts since they will likely be depleted by the beneficiary.
- Based on the assumptions, the Results tab will populate a financial assets value (excluding real estate assets) at the time of retirement as well as at the end of the projection and indicate whether there is a surplus or shortfall.

- Within the same financial plan, you also have the ability to create an alternate scenario - modifying assumptions such as Retirement Age, Retirement Income Needs, Contributions towards investment accounts and assumed Rate of Return. Simply input the value or drag the sliders and the projection will update in real-time.
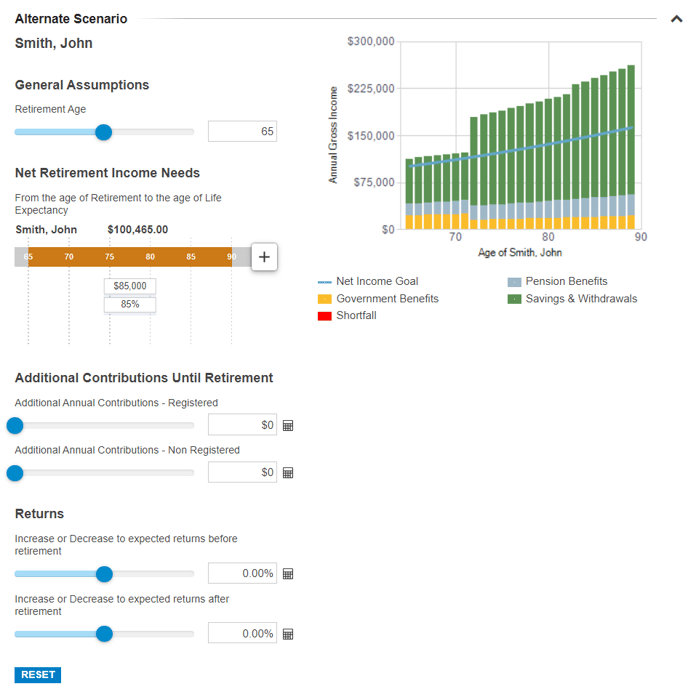
- If you scroll down and click the arrow to the right of Current Plan Details or Alternate Scenario Details, you can see a year by year breakdown of the calculations.
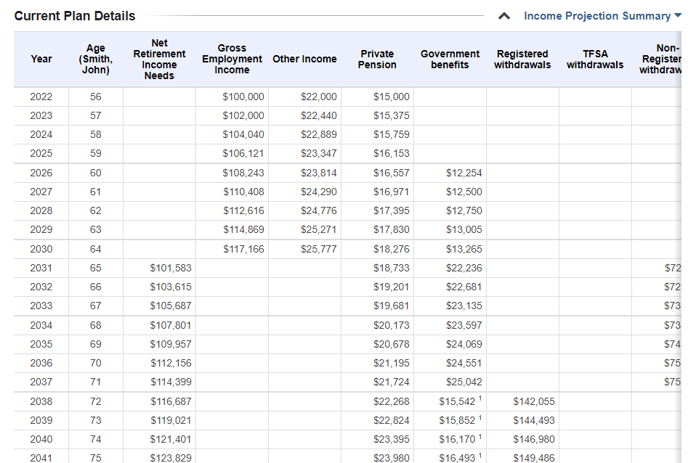
- This table will also be captured when populating the Financial Plan report for the client.
Generating/Viewing a Financial Planning Report
From within a client's Financial Plan profile:
- Click on Reports in the navigation menu, then click Reports once again from the additional options.
- The "Prepared by" section can be modified and can also be set up with your default information by clicking the cog on the top right and inputting the details in User Information.

- You also have the ability to add a picture which will be populated on the second page of the report.
- To generate a comprehensive Financial Plan report for your client, de-select any items listed from Education onwards; then scroll down and click "Create PDF".
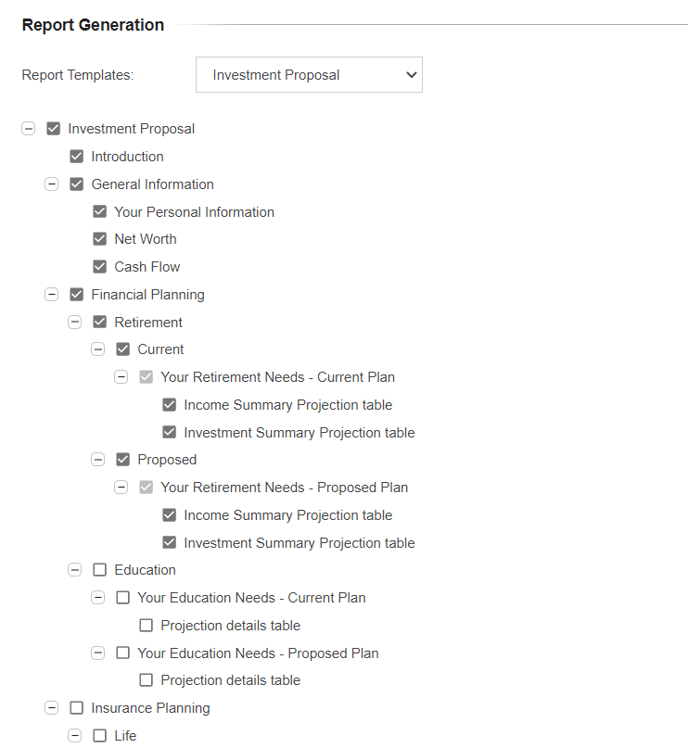
- If your Financial Plan doesn't have an Alternate Scenario, de-select all the items from Proposed onwards
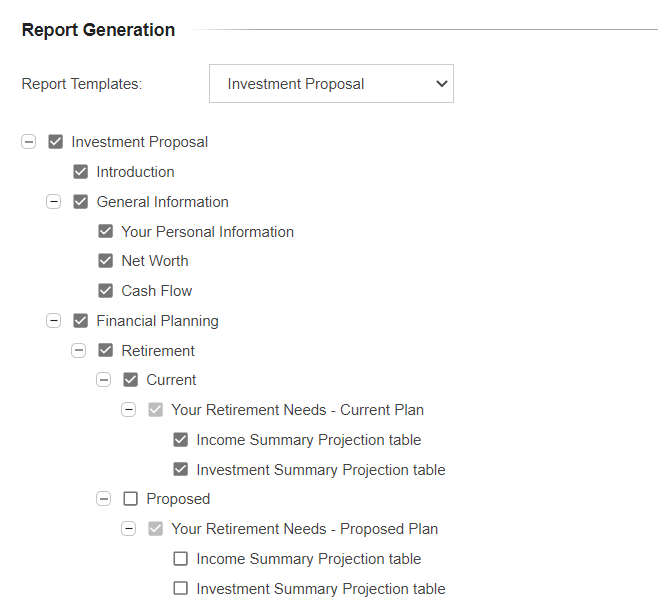
- Scroll down and click Create PDF to generate the report.
- Once the Financial Plan has been generated, you can open the PDF by clicking the report at the bottom of the page.