
Utilize the email-forwarding feature built into your Optimize email to automatically forward CRM email notifications which you receive to a member of your team.
Follow the below steps as a guide to set up automatic forwarding:
- Navigate and sign into your Optimize email
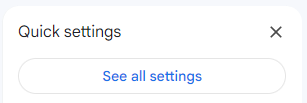
- In the top right corner of your Inbox, click the Settings cog, then See all settings

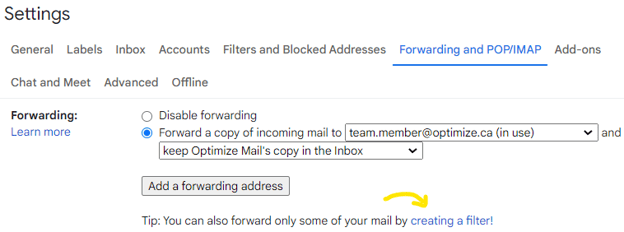
- Click the Forwarding and POP/IMAP tab

- In the Forwarding section, click Add a forwarding address
- Enter the email address you want to forward messages to then click Next
- In the pop-up window that appears, click Proceed
- In order to state the specific emails which are to be forwarded, click on creating a filter
- To automatically forward CRM Notifications, type in noreply@hubspot.com into the From field
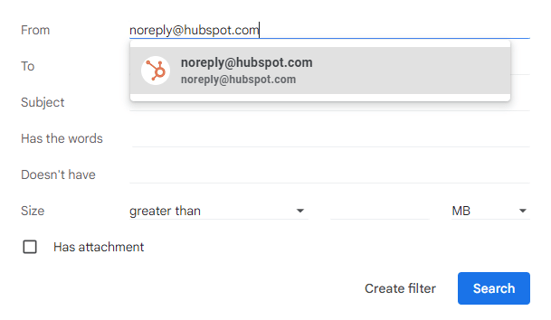
- Then, click Create filter
- From the next options window, check the Forward it to box and select the member of your team who is to receive the forwarded emails from the dropdown menu
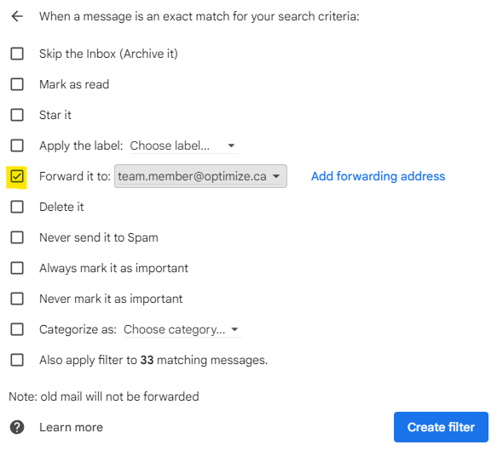
- Then finally, click Create filter
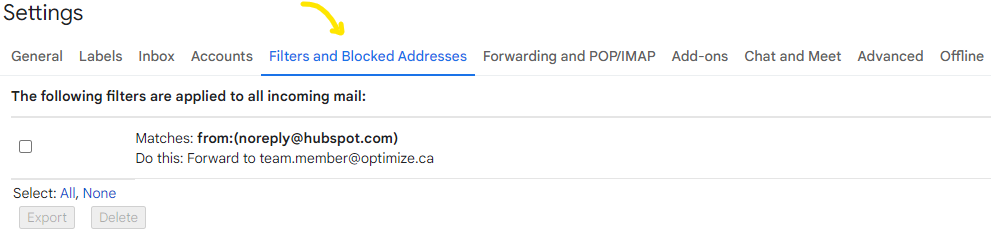
You can check to see that you have successfully set up filtered email forwarding from the Filters and Blocked Addresses tab
By setting up automatic email-forwarding, you can easily share your CRM notifications with a member of your team as they relate to any outstanding service requests, including rejection notices and status-follow-up notices.
Tip: To forward your CRM Notifications to more than one member of your team, you can create a forwarding chain by setting up the automatic filtered email forwarding feature for each member of your team.